This lab is all about static routing configuration. Using cisco packet tracer here i will explain static routing configuration in simplest way and try to explain you the static routing configuration codes. So you can easily understand static routing configuration using this example lab having two routers and total three network. I have used cisco packet tracer software to show this static routing lab. In this article i will also show you how to assign ip address on router interfaces and how to setup ip address and gateway ip on PC.

Step 1: Draw the topology Diagram using cisco Packet Tracer as shown below.

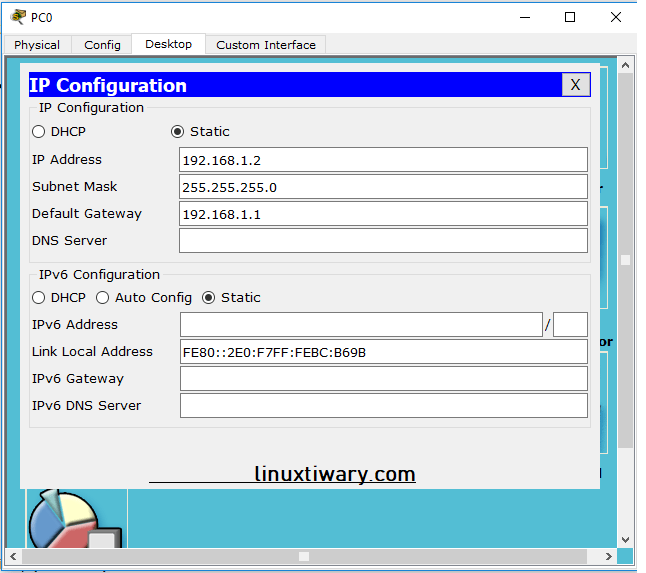
Step 2: Assign IP Address and gateway IP on Both PC as Shown below.

Step 3:Assign IP Address and Hostname on Router R1:
Assign IP Address on Interface Fa0/0
Router>enable
Router#config terminal
Router(config)#host R1
R1(config)#int fa0/0
R1(config-if)#ip add 192.168.1.1 255.255.255.0
R1(config-if)#no shut
R1(config-if)#exit
Assign IP Address on Interface Fa0/1
R1(config)#int fa0/1
R1(config-if)#ip add 192.168.2.1 255.255.255.0
R1(config-if)#no shut
Step 4: Assign IP Address on Router R2:
Assign IP Address on Interface Fa0/0
Router(config)#host R2
R2(config)#int fa0/0
R2(config-if)#ip add 192.168.2.2 255.255.255.0
R2(config-if)#no shut
Assign IP Address on Interface Fa0/1
R2(config-if)#exit
R2(config)#int fa0/1
R2(config-if)#ip add 192.168.3.1 255.255.255.0
R2(config-if)#no shut
Step 5: Static Routing Configuration on Router R1:
R1(config)#ip route 192.168.3.0 255.255.255.0 192.168.2.2
Step 6: Static Routing Configuration on Router R2:
R2(config)#ip route 192.168.1.0 255.255.255.0 192.168.2.1
Step 7: Check and troubleshoot IP Route
R1#show ip route
Discover more from Learn Linux CCNA CCNP CEH CISSP CISA Penetration-Testing Bug Bounty IPv6 Cyber-Security Network-Security Online
Subscribe to get the latest posts sent to your email.
