This tutorial is all about NTP Authentication configuration on cisco router.to perform this lab i have used cisco packet tracer Lab.To ensure that erroneous time information is not propagated throughout the network, NTP authentication can be configured.
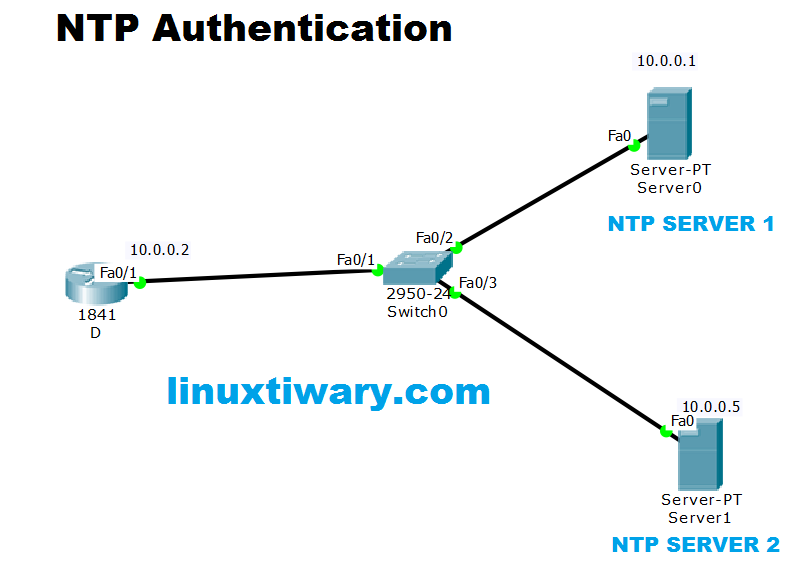
Step 1:First Design the Topology diagram and assign IP Addreses.
assign ip address on router interface and server as i have mentioned in Topology diagram.And wait till all port show green signal.
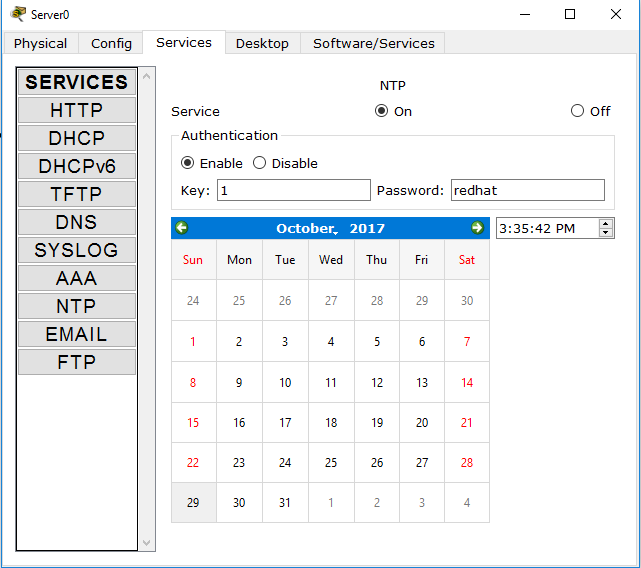
Step 2: Configure Both NTP Server with key 1 and password is redhat.
Step 3:Now configure Router D as NTP Client of Both NTP Server.
D(config)#clock timezone CST -6

D(config)#ntp server 10.0.0.1

D(config)#ntp server 10.0.0.5
STEP 4:Now configure NTP authentication on RouterD:
D(config)#ntp authentication-key 1 md5 redhat

D(config)#ntp trusted-key 1

D(config)#ntp server 10.0.0.1  key  1
Note that authentication-key must be same on the both NTP Devices.
Step 5:Verify NTP to see current date and time.
D#show clock

9:25:43.712 CST Sun Oct 29 2017
Step 6:Check the status of NTP synchronization.
D#show ntp status

Clock is synchronized, stratum 2, reference is 10.0.0.1

nominal freq is 250.0000 Hz, actual freq is 249.9990 Hz, precision is 2**19

reference time is DD76414A.000000D7 (15:24:58.215 UTC Sun Oct 29 2017)

clock offset is 0.00 msec, root delay is 0.00 msec

root dispersion is 0.02 msec, peer dispersion is 0.02 msec.

Hey
Do you know the syslog configuration in linux ???
LikeLiked by 1 person
Ofcourse Yes.
LikeLiked by 2 people
Can you share the steps??
LikeLiked by 1 person
Very soon i will upload a video on syslog server configuration on Linux Machine on my Youtube channel SLASHROOTDOTIN.
LikeLiked by 2 people